
I've been M.I.A. (not the group) since I've been back from my vacation. We'll blame it on the 2 hour time difference and getting up at 3am on Sunday. Yea, that's why. Also, I've been dealing with work stuff and taking an unnecessary amount of naps. But now I'm back to post a DIY cute sign!
I found this tutorial via Pinterest (shocking, I know), and was directed to diddle dumpling. I haven't had a chance to go through all of the posts but the one's that I have seen are great! There are tons of DIY ideas, but the sign one caught my eye immediately. I'm a huge fan of rustic decor and signs like this and these and these. So, after finding this tutorial, I figured I'd try it for myself. Not only did it turn out great, it's a great idea for gifts on the cheap. Love it!
So, here we go!
In the original tutorial, old, weathered boards were used. I found this piece of wood at a yard sale for .50 cents. I didn't weather it, but I brushed yellow paint on lightly so it looks a little rustic.

The painted board.

Ok, here's where things get interesting. Did you know that if you print words onto a piece of computer paper (*flip the image first), place it upside down on a piece of wood, wet the letters, and go over them with the end of a sharpie or highlighter, the ink transfers onto the wood? I didn't.
I choose the phrase "Green pastures and still waters" because it sounds peaceful and it represents the place we call home. *To print the phrase backwards on the paper, here's what I did:
1. Select the Word Art option
2. Choose a simple design
3. Type in your phrase and adjust the font and size to preference
4. Click on the "Format" tab and look for the "Rotate" button
5. Click on "Rotate" and then on "Flip Horizontal"
6. Bazinga!
I used a small paintbrush to brush water lightly over the letters. I then used a highlighter (with the cap on) to trace over the letters (there's a word for this I can't remember right now). Make sure you rub over the letters every which way. Also, don't press too hard. The paper's wet and it will tear the paper, so be careful.


This is what it looked like after transferring the ink to the board.


If the letters aren't as dark as you would like, like these were, you can paint over them with diluted paint. I had to paint mine a few times to get them as dark as I wanted because I did it once then let it sit for awhile before I realized I wanted it darker.

This is what I looked like after the first time I painted the letters. Painting went surprisingly well. My hands are pretty shaky when doing things like this, but for some reason the paint stayed where it needed to. Weee!

Finished!!!


So there you have it! Super easy and a great gift idea, especially if you know someone's favorite quote. Easy and personalized...sold!
In the original tutorial, old, weathered boards were used. I found this piece of wood at a yard sale for .50 cents. I didn't weather it, but I brushed yellow paint on lightly so it looks a little rustic.

The painted board.

Ok, here's where things get interesting. Did you know that if you print words onto a piece of computer paper (*flip the image first), place it upside down on a piece of wood, wet the letters, and go over them with the end of a sharpie or highlighter, the ink transfers onto the wood? I didn't.
I choose the phrase "Green pastures and still waters" because it sounds peaceful and it represents the place we call home. *To print the phrase backwards on the paper, here's what I did:
1. Select the Word Art option
2. Choose a simple design
3. Type in your phrase and adjust the font and size to preference
4. Click on the "Format" tab and look for the "Rotate" button
5. Click on "Rotate" and then on "Flip Horizontal"
6. Bazinga!
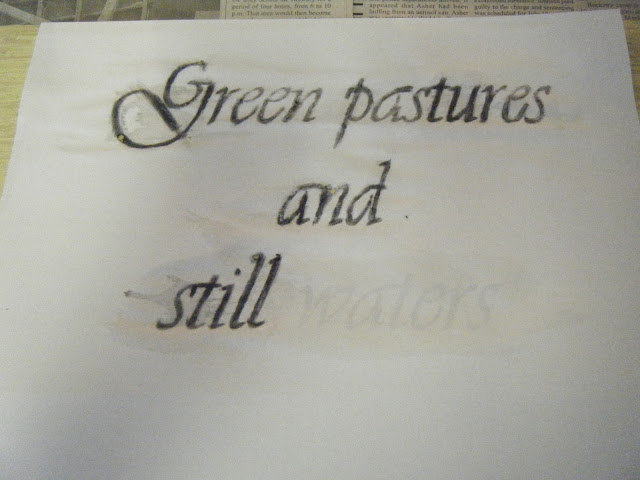
 |
| This is what it looks like when the paper is placed upside down on the wood. |


This is what it looked like after transferring the ink to the board.


This is what I looked like after the first time I painted the letters. Painting went surprisingly well. My hands are pretty shaky when doing things like this, but for some reason the paint stayed where it needed to. Weee!

Finished!!!


So there you have it! Super easy and a great gift idea, especially if you know someone's favorite quote. Easy and personalized...sold!
Wow you did a great job! I'm inspired to make my own sign (once I work up my bravery). I think the hardest part would be the shaky hand!
ReplyDeleteThanks :) They shaky hand wasn't as bad as I thought it would be. In the original tutorial, the letters are much bigger, but I decided (in true "me" fashion) to make it more difficult!
DeleteThis comment has been removed by the author.
ReplyDelete